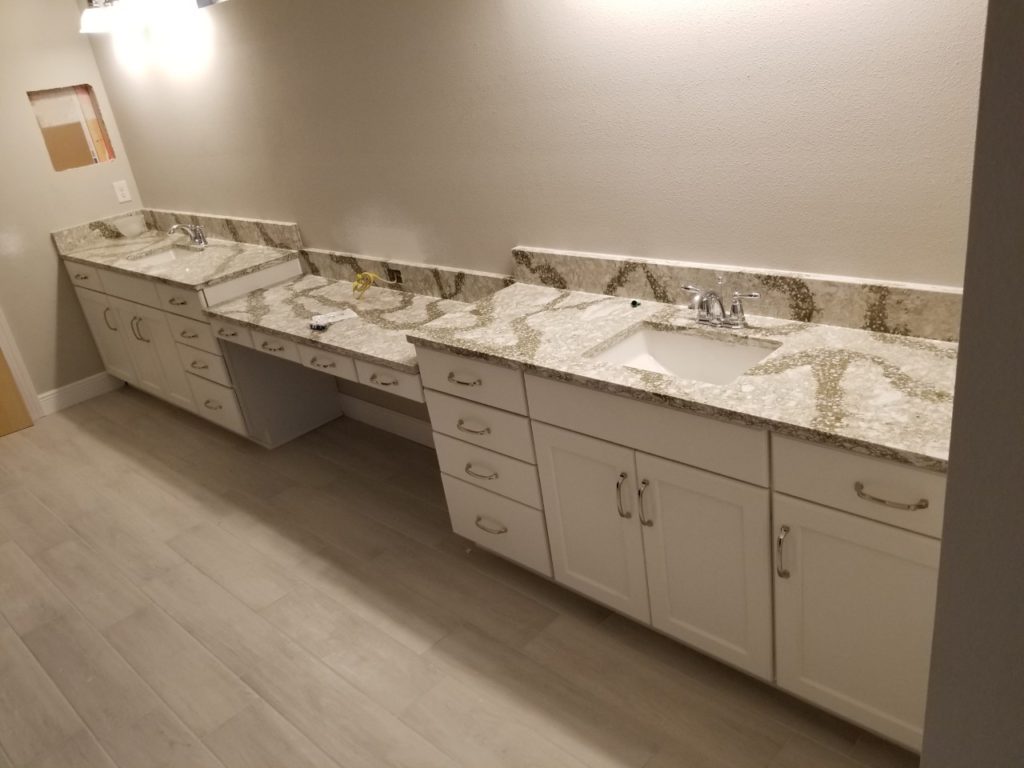
How to Install a Double Vanity Desk: A Step-by-Step Guide

Learning how to install a double vanity desk may seem daunting, but it’s a lot easier than it appears.
And if you’re a carpenter, cabinet installer, or a DIYer looking to score some brownie points with your spouse (or a customer is paying you), here’s the ultimate way to do it.
First of all, why are vanity desks so popular?
Because they convert any bathroom vanity into a functional makeup desk, all while conserving space elsewhere.
Most of the time, they are set up like the one below. Two vanity cabinets with the desk set between.
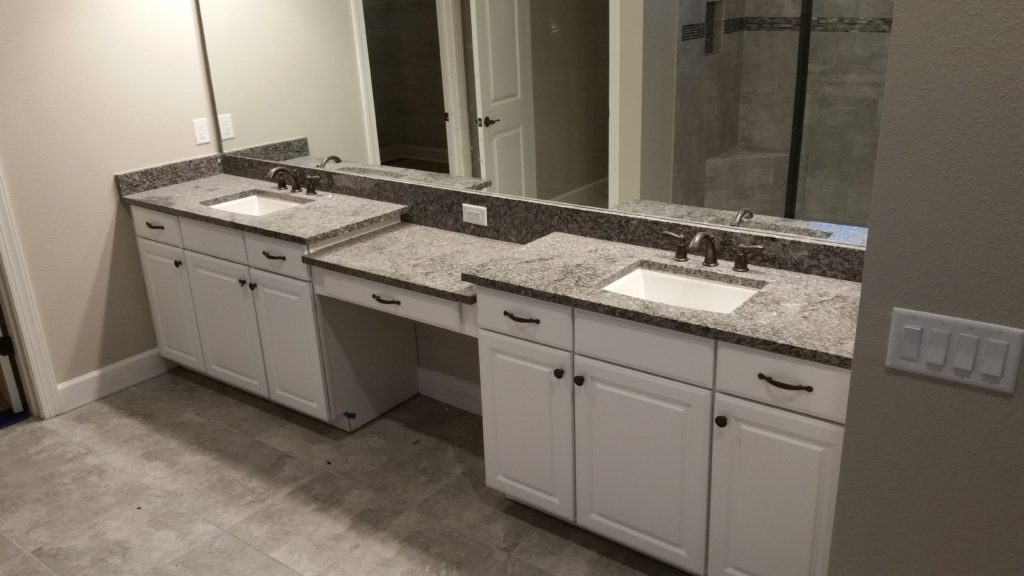
There are other configurations, however. I’ve installed quite a number of them against a wall or like this:
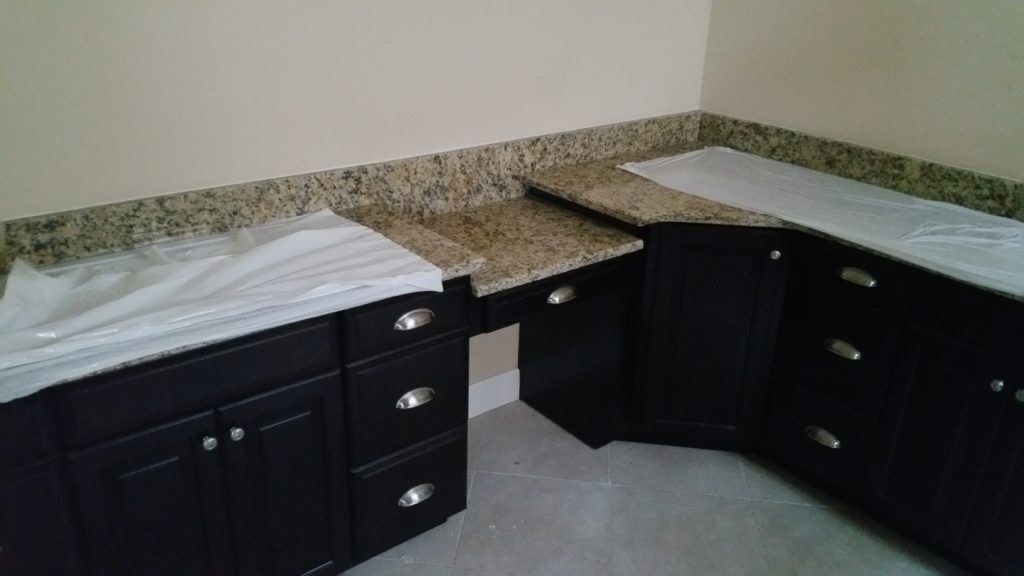
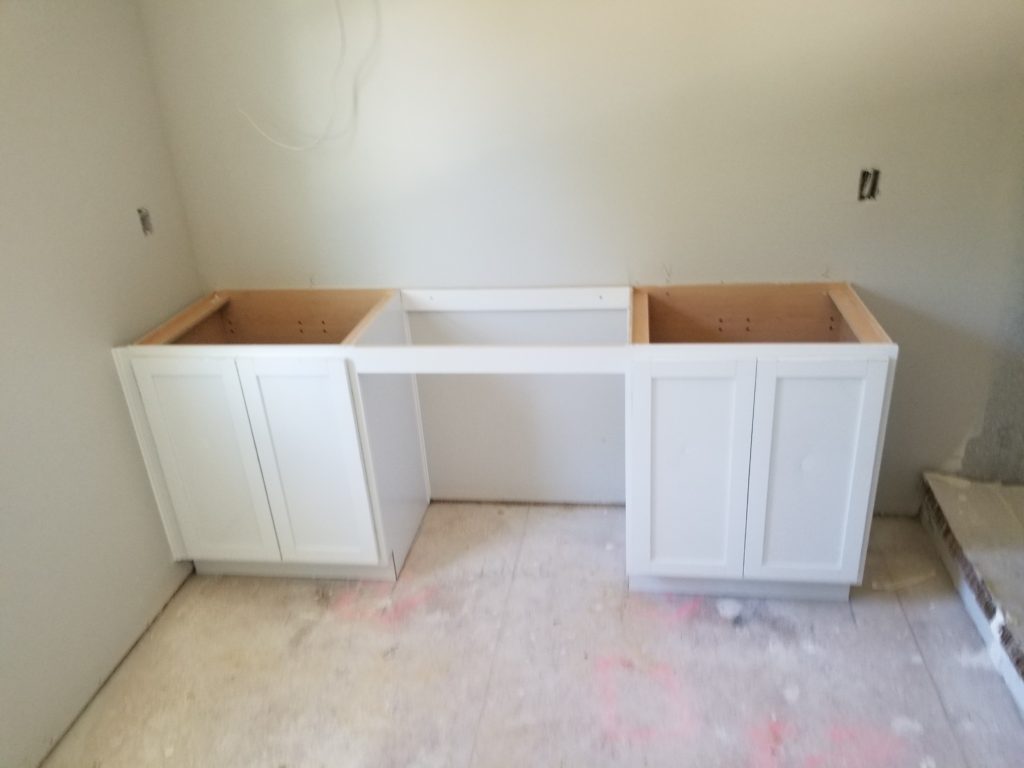
No matter where they’re located, they’re pretty helpful. But recently, I came across something I hadn’t seen before, a double vanity desk (seen in the first picture).
Intriguing, isn’t it?
Ready to learn how to install one? Then Keep reading.
How Does it Support Granite Without Collapsing?
When I saw the layout, I immediately doubted the structural integrity of such a design. Wouldn’t the weight of the granite be an issue? Shouldn’t there be some support directly under the desk, or at least a gusset-style support that brought the weight back to the wall?
After thinking about it for a few minutes, I installed it like any other vanity desk . . . almost (I’ll point out the difference when I get there).
And I used my usual method because the way that I install vanity desks takes nearly all of the weight off the desk itself. In fact, I’ve entirely removed one I had installed weeks before without removing the granite!
So what’s my method? I’ll take you through it step by step.
First, let’s look at what we’re trying to achieve. Here’s the finished product without granite to give you a better idea of what we’re trying to achieve:
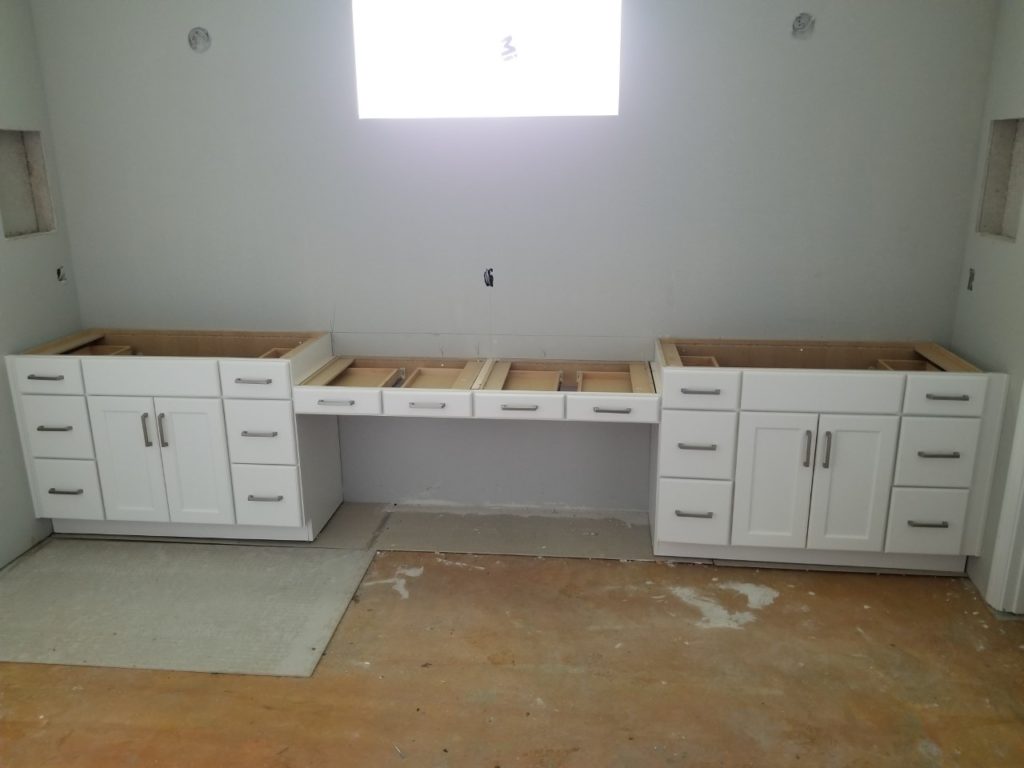
Step #1: Install Both Vanity Cabinets First
I always install both outside vanity cabinets first.
I install the outside vanities first because it makes life easier when you have a solid foundation to insert the desk.
The only thing you need to know is the distance required to fit both desk cabinets between the vanities. Make sure you know this measurement before proceeding.
You don’t want cabinets moving when trying to attach the middle desks.
Find the high point on the floor and install that vanity first, then leave a space for the desk (that’s the measure discussed above) and install the second vanity. What you want is something like this:
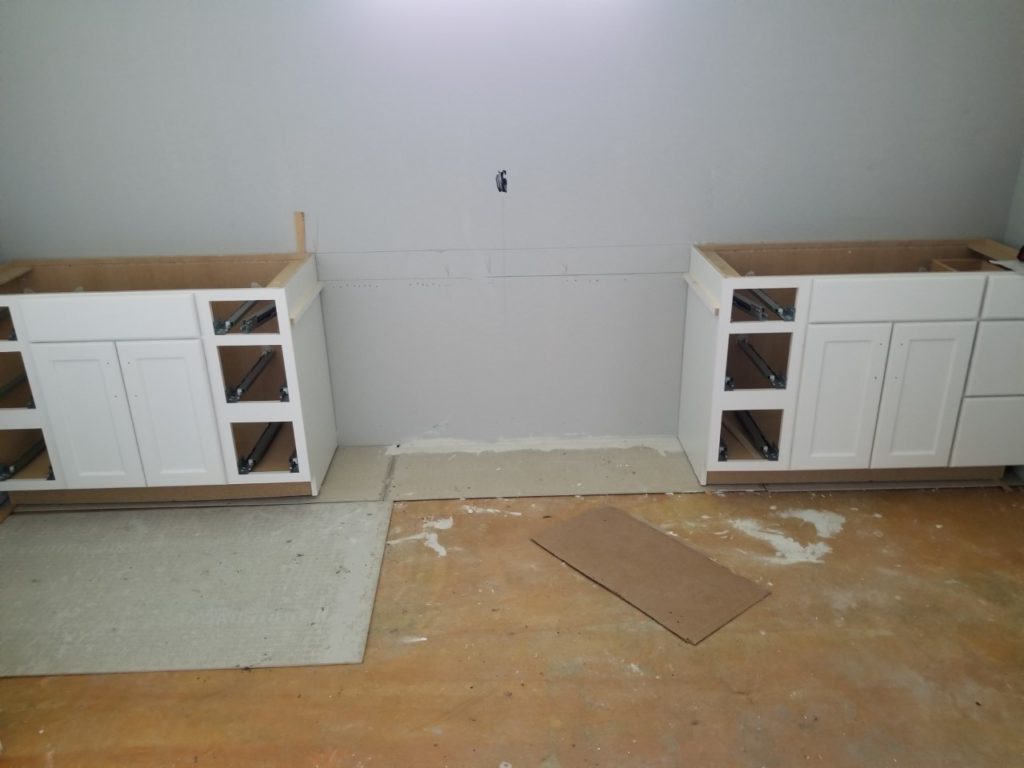
If leveling the cabinets is difficult, cut a piece of scrap wood to set the distance. This way, the cabinets stay the needed distance apart while leveling. I usually mark the wall and continuously check and recheck my measurement while installing, but again, there’s no shame in using a spacing stick.
The other thing to remember during this process is to make sure that both cabinets are not only level themselves but also level to one another. A flat, level surface is required here. I can’t stress that enough. If both vanities are installed level in the beginning, then the rest of the process is much easier.
Step #2: Cleat the Sides
See those two wood pieces on the cabinets’ sides in the above picture? Those are cleats. They serve two essential functions.
- They help support the weight of the countertop
- They serve as a guide for installing the vanity desk
Here’s a closer look:
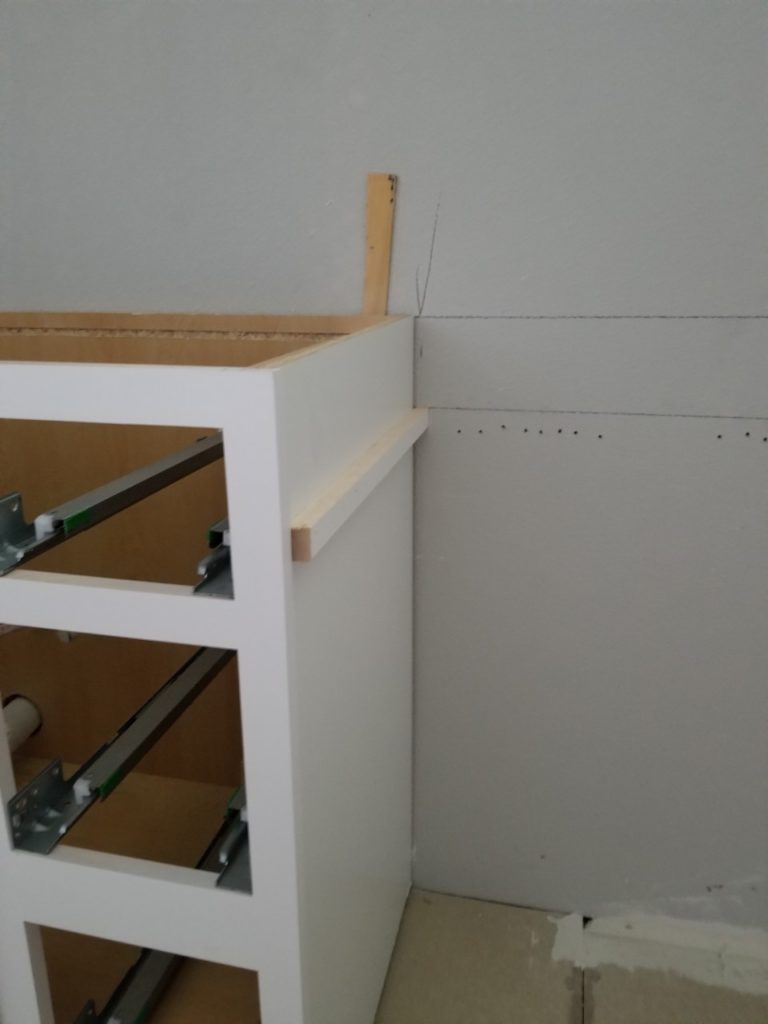
How far down do you mount the cleats?
For a standard 34 1/2″ high vanity, I put them 4 1/2″ down from the top (or 30″ off the floor). Note: If your vanity is shorter than this (some are 31″ and others are 31 1/2″ depending on the manufacturer) keep the vanity desk flush with the top to ensure you’ll have enough leg room underneath.
The vanity desk is ready to install now that the sides are cleated.
Step #3: Install the First Vanity Desk
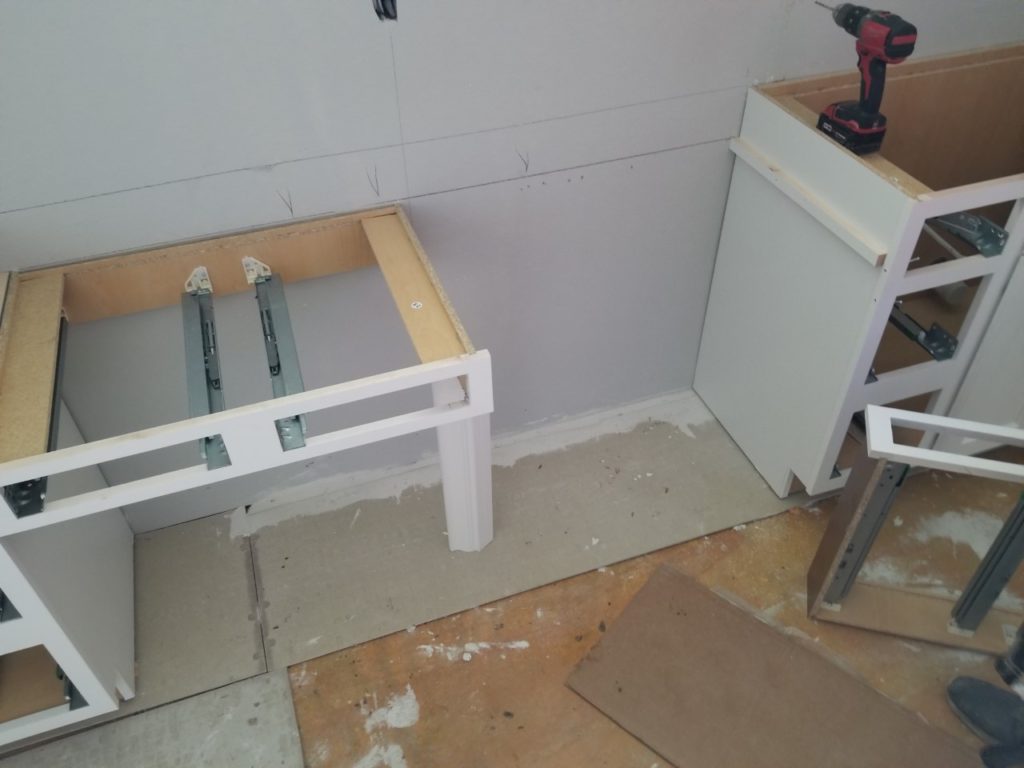
Remove the drawer slides (if any) and drill two 3/16″ holes on each side of the cabinet where the desk will be mounted. Just make sure the holes aren’t too low. You can see where I did this in the picture below.
I always install the left one first.
To make the process smoother, I cut a temporary brace and set it on the free-floating side while holding the top of the desk flush with the top of the cleat. This way, you know exactly where the top of the desk is supposed to be mounted. Then screw the desk to the vanity.
Before moving to the next step, remove the drawer slide where the other desk will be attached and drill a few 3/16″ holes.
Why drill these holes? Two reasons. One is to prevent the face frame from cracking, and the other is to avoid what is know in carpentry as “bridging.” Bridging is when the screws push apart two pieces of wood. If one piece of wood is pre-drilled with a hole larger than the screw, it will always pull the two pieces together tightly.
Step #4: Install the Second Desk
One down, one to go.
The second desk should fit fine if everything was set correctly. If it makes it easier, cut another brace to hold the free-floating side of the desk while attaching the cabinet side.
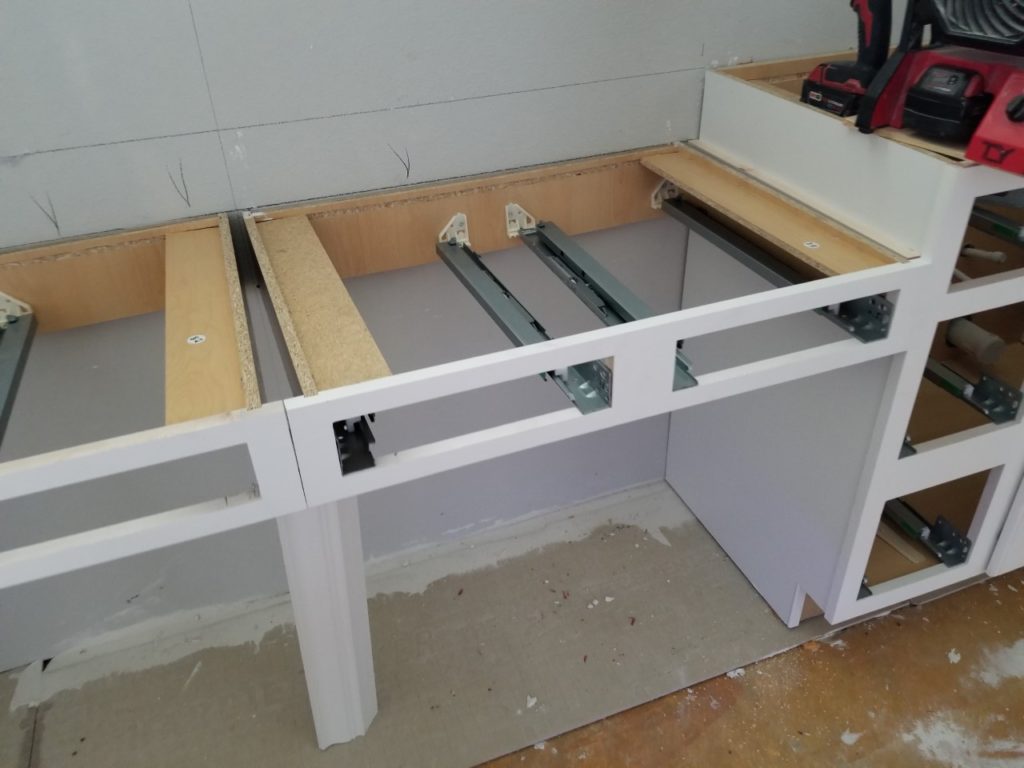
Now that both desks are mounted to the cabinets, the only thing left is to fasten them together. One of desks is already predrilled, so all that’s needed is to screw them together like this:
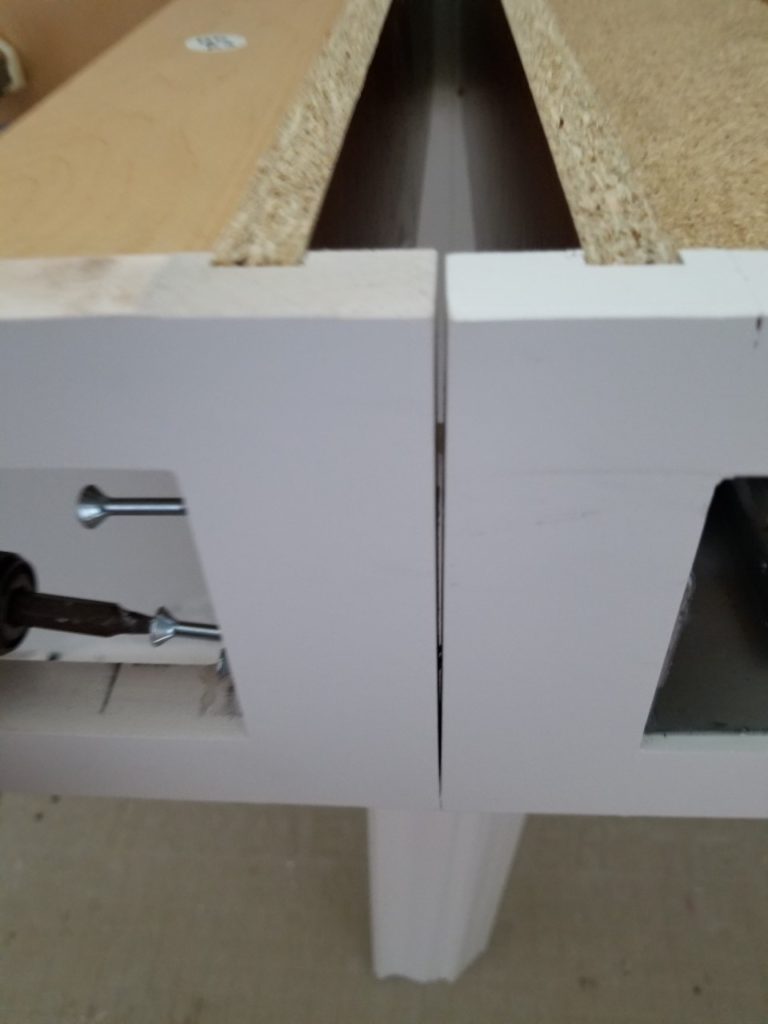
Remember in the beginning when I said: “I installed it like any other vanity desk . . . almost?”
Here’s the difference, I added a brace between the two to act as a “spine” that would provide additional support. All I used was a 2″ x 4″ ripped to the distance between the two desks. Then I nailed and screwed all of it together:
Step #5: Add a Support “Spine” Between the Two Desks
The best way to explain this is with two pictures.
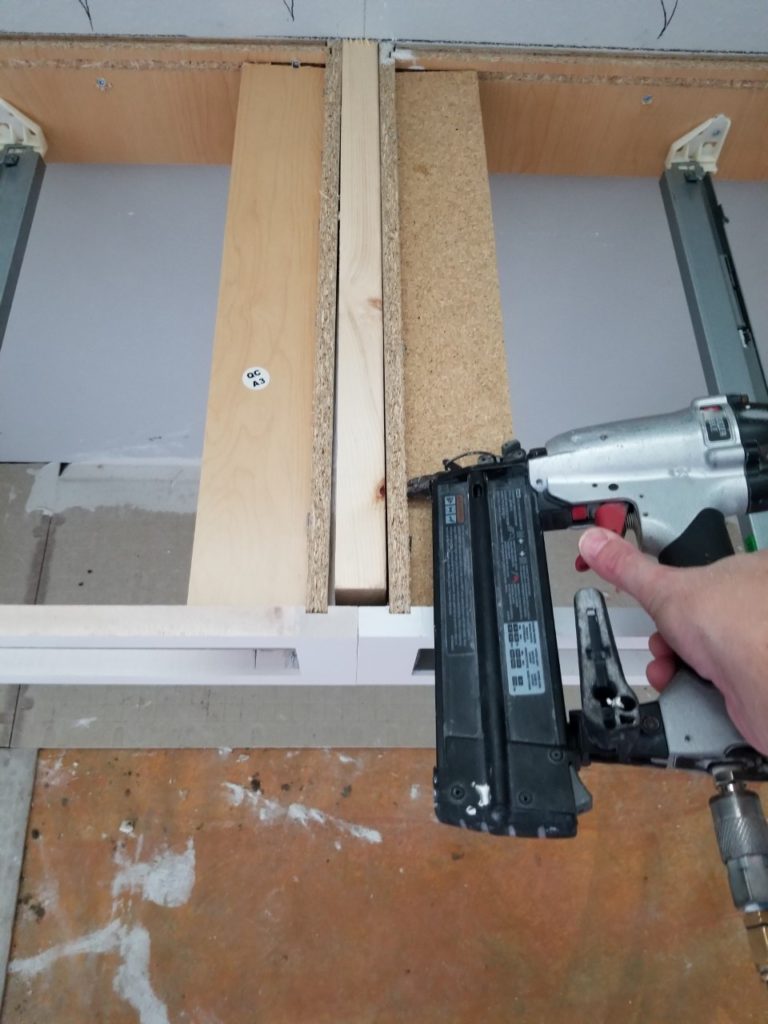
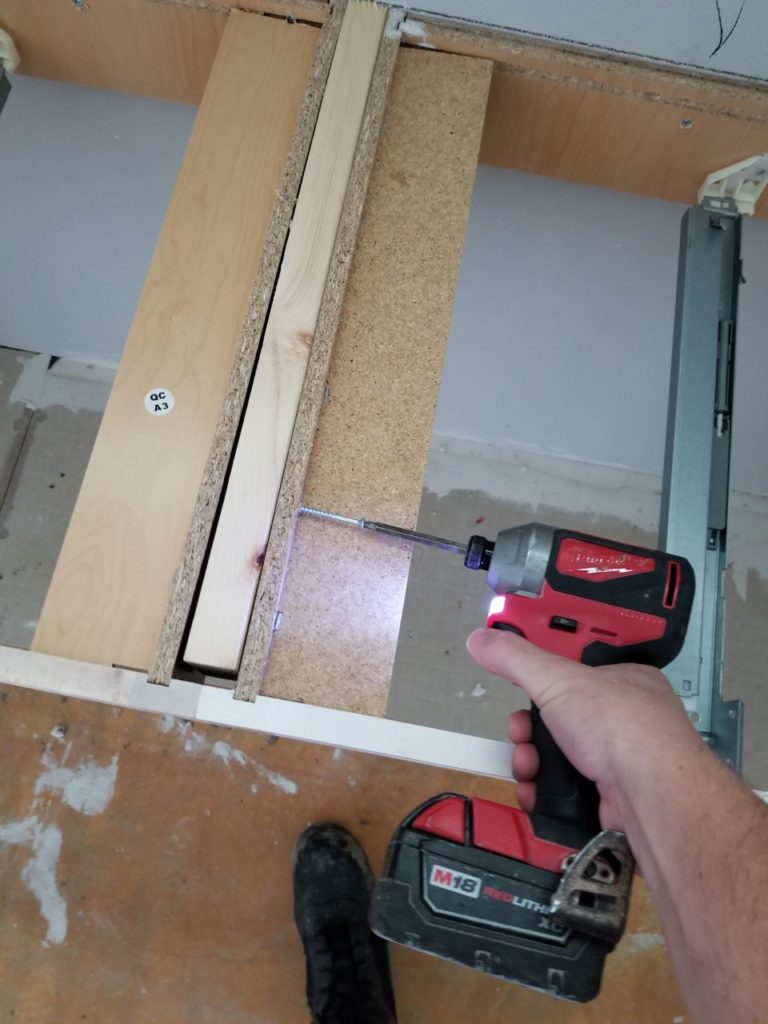
If you haven’t already, screw both desks to the wall. Everything should be installed at this point, giving you something that looks like this:
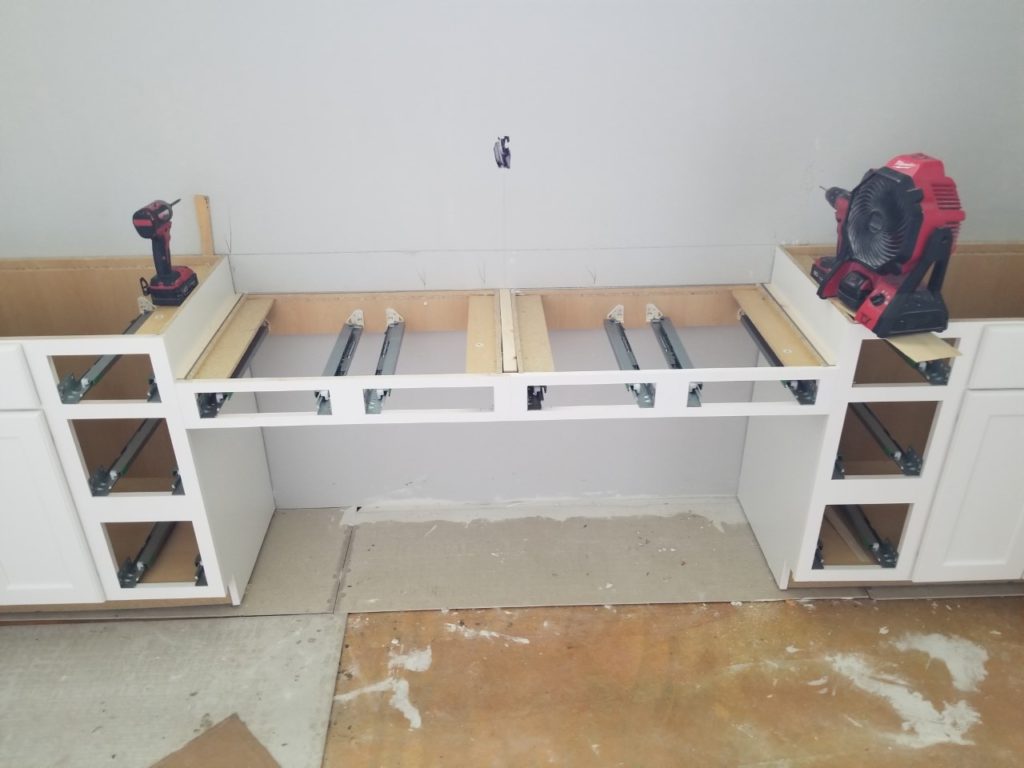
Once both desks are installed, reinstall any drawer slides previously removed and all the drawers. You’re now ready for whatever type of countertops.
But Wait . . . There’s More
Let’s say you want a vanity desk but don’t have the cash to buy one. Good news. You have another option:
BONUS SECTION: A Cheap Alternative to a Vanity Desk Cabinet
If you’re trying to save money but still want a vanity desk’s functionality, you’ll love this quick and easy idea. Check it out:
I can’t take the credit for coming up with this idea, but it’s cheaper and has a unique advantage.
You can make it any width you want so long as you have the material. The designer chose to flush the desk to the top of the vanities in the picture above. You don’t have to select this option. It could be mounted lower, just like the above double desk we’ve been building.
But whichever style you choose, there’s only one thing left to do. . .
Install a Double Vanity Desk!
Now that you know how-to install a double vanity desk it’s time to put that knowledge into action.
Imagine the points you’ll score with your spouse.
All you need to do now is reread the article, get out your tools, throw on some music, and dive in. Don’t worry, we’ve covered everything you’ll need to know. If you get stuck, reread a section or take a break.
And use a spacer to keep the proper distance between cabinets if you can’t get it right. But most of all, take your time. The result will be well worth it.
If you have any questions, are a designer, small builder, or distributor in Tampa, Florida, and are looking for cabinet installation, please contact me.
Copyright Blackburn Custom Woodworking, Inc. 2023